How to Clean a Nebulizer Properly at Home

Any device that comes in contact with mist, humidity, and respiration can quickly become a breeding ground for bacteria, and that’s exactly what can happen within your nebulizer.
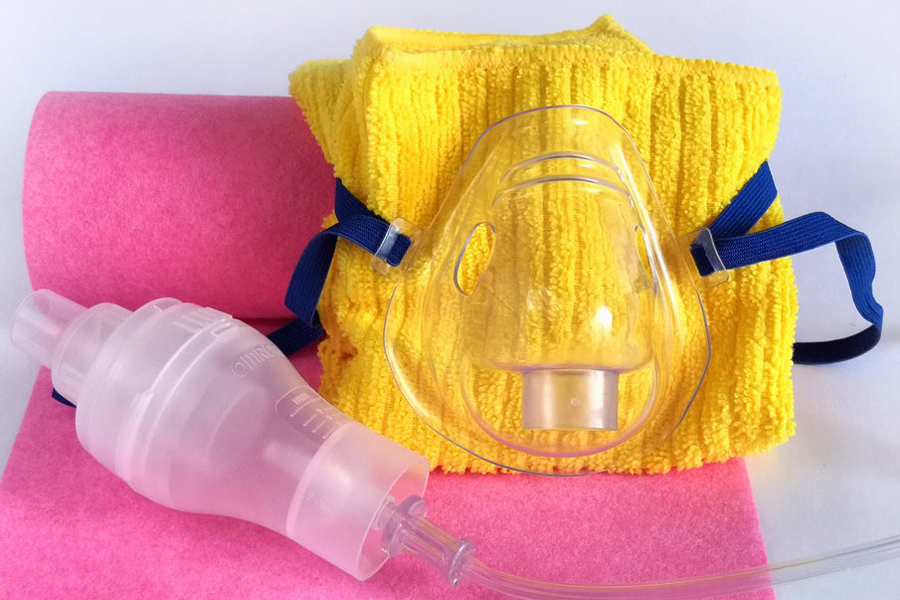
A nebulizer is a medical device that turns liquid medicine into a fine mist for you to inhale. It is often recommended for those who have common respiratory diseases, including asthma, COPD, or bronchitis.
When you use a nebulizer, you will place your mouth onto the mouthpiece or mask of the nebulizer and allow the mist to enter your lungs as you inhale. When you are finished with the treatment, moisture will become trapped inside the nebulizer. This can cause the nebulizer to become dirty and potentially grow bacteria within the device, which is the last thing you want to have happened when using a medical device.
Failing to properly clean your nebulizer can cause you to become sick from the very thing that is designed to help you feel better, which is why we are going to give you instructions on how to clean your nebulizer properly at home.
You can clean your nebulizer in one of two ways: quick-cleaning or deep-cleaning. Quick-cleaning your nebulizer is something you should do after each use, while deep-cleaning is something you should do at least once a week.
Quick-Cleaning Step-by-Step Guide
STEP 1: DISASSEMBLE THE NEBULIZER
First, you will need to take the nebulizer apart. This includes the mouthpiece or mask, nebulizer tubing, and connectors. Only keep pieces of the nebulizer connected if they don’t come apart. The mouthpiece is the most important part that you will need to make sure comes apart because it is the piece of the nebulizer that will come in direct contact with your mouth.
Place the air compressor portion of the nebulizer to the side. You will not need to wash this piece of the nebulizer since it contains the mechanical piece that will turn the medicine into a spray.
STEP 2: THOROUGHLY RINSE THE NEBULIZER PIECES
Using running warm water, run the nebulizer pieces under the warm water. Make sure to rinse the inside of the tubing, connectors, and mouthpieces. Both the inside and outside of the pieces will need to be rinsed thoroughly with warm running water.
STEP 3: LET THE NEBULIZER PIECES AIR DRY
Once all of the pieces have been thoroughly rinsed with water, let them air dry. The tubing pieces will take the longest to air dry, but make sure you allow them to air dry completely.
STEP 4: REASSEMBLE THE NEBULIZER
Make sure all of the pieces are completely dry before reassembling the nebulizer pieces. Once the nebulizer has been reassembled, run air through the machine. This will make sure that all the water within the nebulizer has dried completely and that the nebulizer has been reassembled correctly.
STEP 5: STORE THE NEBULIZER
This step is important. Make sure you store your nebulizer in a place where dust can’t collect within it, as the dust can mix with the medicine vapors and cause you to inadvertently inhale them when doing a breathing treatment.
We recommend storing the nebulizer in a clean sealed bag or an airtight sterile container to keep any dust or dirt from entering the nebulizer while it is not in use.
Deep-Cleaning Step-by-Step Guide
STEP 1: DISASSEMBLE, RINSE, AND DRY
When deep-cleaning your nebulizer, you will need to follow the steps that you would take when cleaning your nebulizer after each use. Keep the pieces disassembled once they have dried.
Just like in the quick-cleaning guide, you will need to keep the air compressor portion of the nebulizer aside until it is time to reassemble the pieces.
STEP 2: CREATE A DISINFECTANT OF VINEGAR AND WATER
Create a disinfectant mixture of one part white vinegar and two parts of sterile water. Use a large bowl to retain the disinfectant mixture so that the nebulizer pieces can all fit.
(To sterilize tap water, boil and allow the water to cool completely. This will kill any germs or bacteria that may be found in tap water.)
STEP 3: SOAK THE NEBULIZER PIECES
Soak the nebulizer pieces in the disinfectant mixture. This includes the mouthpiece or nebulizer mask, connector, and tubes. Make sure the disinfectant solution covers the pieces entirely. The pieces will need to soak for about 30 minutes, but no more than one hour.
STEP 4: RINSE THE NEBULIZER PIECES
Once the nebulizer pieces have finished soaking, they will need to be rinsed. This will rinse the disinfectant solution from sticking to the pieces. Discard the disinfectant solution and rinse the nebulizer equipment under warm running water just as you did during the quick-cleaning process. This time, make sure you rinse the pieces under warm running water for 30 seconds.
STEP 5: LET THE NEBULIZER PIECES AIR DRY
Remove the pieces from the disinfectant mixture and place them onto a paper-toweled surface and allow them to air dry completely, just as you did when quick-cleaning the nebulizer pieces.
STEP 6: REASSEMBLE THE NEBULIZER
After the nebulizer pieces have completely dried, your nebulizer will need to be reassembled. Run air through the machine just as you did when quick-cleaning the nebulizer. This will make sure that all of the water within the nebulizer has been completely dried.
STEP 7: STORE THE NEBULIZER
Just as you did when quick-cleaning the nebulizer machine, you will need to make sure you store the nebulizer in a sterile, sealed location, like a sealable bag or sterile, airtight container.
Conclusion
You should quick-clean your nebulizer machine after each use. Proper nebulizer care will ensure that no bacteria will begin to grow within the components of the nebulizer.
The nebulizer should also be deep-cleaned at least once a week when it is in use to kill any bacteria that may have grown within the nebulizer pieces. This is especially important to do if you have not practiced normal daily cleaning habits after each time you’ve used the nebulizer.
Average Lung AirPhysio
ENJOY BETTER BREATHING - Use this 100% Drug Free Device - AIRPHYSIO
Recent Posts
Sports AirPhysio
IMPROVE YOUR SPORTING PERFORMANCE - Use this 100% Drug Free Device - AIRPHYSIO
AirPhysio Child
BETTER BREATHING FOR YOUR CHILD - Use this 100% Drug Free Device - AIRPHYSIO
Categories
- asthma (2)
- atelectasis (2)
- bronchiectasis (2)
- copd (3)
- cystic-fibrosis (45)
- featured (10)
- uncategorized (2)